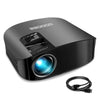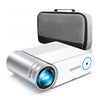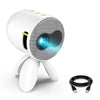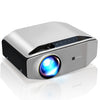
NEW HOME CINEMA PROJECTOR SETUP GUIDE 2019
Watching movies on a big screen is a great experience. It’s a no wonder movie theater in the industry rake in a lot of cash. But if you are anything like me, you’ll not always be up to making the long trip to the city for the experience. But here’s the good news, you can replicate the movie experience in the comfort of your home. All you need is a home theatre projector.
Projector technology has come a long way. A home theatre projector will support high-quality content. This is a good thing. But unfortunately, the high-quality content alone isn’t enough to give you the movie experience you love and crave for.
Luckily, there’s a way to make it all work for you. And here’s the thing, you won’t have to break the bank. If you are looking for a best budget projector under $200, the projector review we wrote, 2019 Top 8 Best Projectors Under $200 Review will give you some advice. A little tweaking of the setup and you’ll be good to go.
So now without further ado, let’s get into the best home theatre projector set up for a home cinema – you’ll be surprised at how quick and easy it all is.
Place the portable projector screen
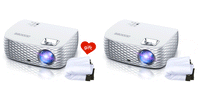
Now at this point, I’m assuming that you already have the best projector for a home theatre experience. If you don’t, now’s a good time to read through my guide for getting the best home theatre projector.Finding a spot for your projector is not as straightforward as picking one for your TV. You need to factor in the size of the projected screen. What’s more, you can DIY projector screen. Here we have some advice for you to DIY projector screen. Depending on the room you choose, you’ll have the option of two walls onto which to project your screen. So clearly, picking a projector wall will not be a hard thing to do.
But while you are at it, try to use the wall that is not flooded with direct light. The light will wash out the picture projected.
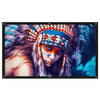
Quick note: you can always invest in a portable projector screen.
In addition to this, you’ll need to factor in the distance of the projected screen from the floor. Generally, anything between 24 and 36 inches from your floor will be great. The projector manual may have some placement information.

What about the projector?
Now, finding a sweet spot for your projector will be the tricky bit of the entire setup. Most projectors come with two options:- Table placement
- Hanging it from the ceiling
In addition to this, you’ll also have to decide whether the projection will be from behind the screen or the front. But if you live in a residential area, behind the screen projection isn’t quite possible. As such, you have limited options.
I prefer ceiling mounting for a couple of reasons. First, once you set up, it’s for life. Not unless you decide to change things up later for whatever reason. Table placement setups are prone to changes since they place the projector on your path. Second, ceiling projectors are safer and less prone to accidents.
When you are doing the actual mounting on the ceiling, try setting the projector on a ladder first to get the sweet spot I mentioned before you drill it to the ceiling.
The Cables
The best home theatre cinema setup should be clean and presentable. You’ve never had to jump over cables at the theater now, have you?Setting up the projector in the middle of the room means you’ll have to deal with cables including HDMI, and the power cable. But instead of having the wires cross over the carpet and be a distraction and a potential safety hazard, you should route them underneath the carpet. If the room is not carpeted a cord concealer will have to do.
If you’ve mounted the projector on the ceiling, run the cables on the walls or through your ceiling.
Note: this will need some extra time and comfort.

Get the best picture
Once the best movie projector is set up, it’s time to get it to project the best picture. This step is super important so don’t skip it.
If the projector is on the ceiling you’ll need a ladder to adjust its height and angle. Today most projector mounts are adjustable so angle adjustment should be a breeze.
Play around with the lens and keystone correction (especially if the screen is projected on a slanted wall. This will align it).
Get the video in focus
Once the screen is in the right place and is properly aligned, its time to get the video in focus. These are minor adjustments and they are pretty simple. The adjustments are made via a ring around the lens.
Speaking of the ring, there are two: one to zoom in and out and another to focus. Work both of them to get the perfect video.
Setting the sound
I know we all think the high-quality video is everything. But it’s not. Actually, it’s one half of the experience. The other half is all about sound. Most projectors lack built-in speakers. And even for those that have speakers, the quality is nowhere comparable to a cinema.
Here is where a quality sound system comes in. connect the projector to the sound system and your set up is complete.
Summary
A home theatre projector setup is without a doubt an investment that will offer you exhilarating experiences for many years to come. When you get the setup right, your gaming, TV and movie watching experience will be unmatched. Just remember to invest in the best movie projector (it doesn’t have to be insanely expensive).


